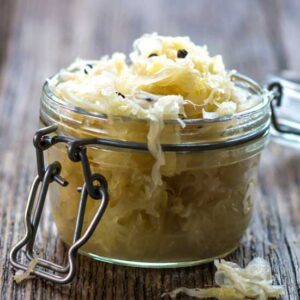
Photo by Getty Images/zeleno.
Making sauerkraut is a delicious, traditional way to
preserve all that extra cabbage your garden produces… and
kraut makin’ is a remarkably quick and easy process, too!
As a matter of fact—when you combine shredded cabbage
and salt in a nonmetal container—it’s almost
impossible not to make a success of this tasty
staple. The two ingredients provide the necessary brine … and bacteria (which are naturally present on cabbage
leaves) will initiate the fermentation process that allows
you to store the kraut through the long winter months.
First, The Utensils
To start your homemade sauerkraut, you’ll need to gather up a
sharp knife, a kraut (or slaw) shredder, a large pan,
scales, a measuring spoon or cup, a nonmetallic vessel
that’s large enough to hold your cabbage supply, a pencil
and a notepad, a wooden tamper or “stomper,” a pressure
plate (this can be a wooden disk or dinner plate) to fit
inside the crock or jar, a heavy rock to weight the plate,
and a thermometer to measure the air temperature. Add a
nice clean work area with plenty of elbow room to cut and
“stomp” … and you’re set to go!
The only ingredients required for your homemade kraut are
firm, fresh heads of cabbage and “pickling” salt … a
flavoring which has none of the chemical additives that can
affect food color and taste. (Some folks say that sea salt
also works fine.)
Slice the cabbages in half and remove their hearts (save
these to marinate in oil, vinegar, and spices for some
delicious “refrigerator pickles” … a real treat!), then
shred the vegetable with a slaw cutter, catching the
chopped leaves in a large pan.
When all your cabbage is shredded, weigh it on the scales
(taking into account the heft of the pan it’s in), and
record the weight of each batch before mixing the
vegetable and salt in a large earthenware pot or a jar.
You’ll need enough salt to equal about 2.5% of the weight
of your cabbage. It’s safe to figure that a 10-gallon crock
will hold about 80 pounds of shredded cabbage … which
would require two pounds of salt. In such a case, just
place your cabbage in the crock in eight 10-pound layers … and add 1/4 pound of salt per layer. (If you’re using a
five-gallon container, you can cut the amounts—and
layer sizes—in half.)
Stomp, Stomp, Stomp
As each cabbage/salt level is completed, the mixture must
be tamped or “stomped”—with a wooden mallet—to
release the cabbage’s natural juices … and to mix the
salt with the vegetable liquid in order to form a curing
brine.
When all the layers have been added and stomped, the
container should be filled to within three or four inches
of the top … and all the vegetable matter covered with
brine. Then place the plate on the mixture and weight it
down with a rock. (Any cabbage that’s not held
under the brine will soon rot.) Top the crock with a clean
cloth—to keep out insects and debris—and store
the vessel for the fermentation period.
Kraut will cure nicely on a warm back porch or in
a cool basement … but the environment will influence
the flavor of the finished product: A warn curing
temperature will speed up the fermentation process, while a
cooler area will result in a longer curing time.
Short fermentation tends to produce “sweet” kraut …
prolonged, cool pickling results in “tart”—really
sour—sauerkraut.
While your kraut’s fermentation is progressing, inspect the
crock every day or two and skim off any mold or scum that
may form on the surface of the brine. Such layers are
created by airborne, yeastlike bacteria that utilize the
vital lactic acid as a source of food. While harmless in
itself, the mold can lower the concentration of lactic acid
below the point necessary for preservation.
As the curing continues, bubbles will form and work in the
brine. A cessation of this activity indicates that the
pickling process has reached completion. At this point, you
can serve up the first batch . . . then store the container
in a much cooler place—such as a root cellar—to
arrest further fermentation and keep your kraut tasty for
the coming year … and/or preserve the kraut
indefinitely by canning it. (Take care to fill the jars
with additional brine when an insufficient amount
remains from curing … then seal them, heat to boiling
in a water bath, hold that temperature for 30 minutes, and
retighten the lids.)
A Taste Surprise
Homemade kraut is always an adventure, because no two
batches of this delicacy ever turn out exactly alike. In
fact, if it’s consistent flavor you want, you’d better
stick to the store-bought variety.
Moreover, there’s no “best” method for preparing this tasty
dish. The advice given here will get you started with your
first batch, but you might want to try a little more (or
less) salt in your second recipe … to get the tang
that’s exactly to your personal liking. Experiment with a
crockful that’s been warm-temperature cured, and then a
cool one.
Remember: Although there are scads of ways to turn
out delicious sauerkraut, there are even more ways to enjoy
it: hot with dumplings, baked with spare ribs, in
sandwiches or soups, with hot dogs or knackwurst, boiled
with dried peas, with Thanksgiving turkey or roast duck or
goose … even just eaten raw by the handful, straight from
the crock.


